JS 윈도우 열기
<!DOCTYPE html>
<html>
<head>
<title>윈도우 열기</title>
<script>
function load(URL) {
window.open(URL, "myWin", left = 300, top = 300, width = 400, height = 300);
}
</script>
</head>
<body>
<h3>window.open()으로 윈도우 열기</h3>
<hr>
</body>
</html>

js 윈도우 닫기
<!DOCTYPE html>
<html>
<head>
<title>윈도우 닫기</title>
<script>
var newWin = null; // 새로 연 윈도우 기억
function load(URL) {
newWin = window.open(URL, "myWin", left = 300, top = 300, width = 400, height = 300);
}
function closeNewWindow() {
if (newWin == null || newWin.closed) { // 윈도우가 열리지 않았거나 닫힌 경우
return; // 윈도우가 없는 경우 그냥 리턴
}
else {
newWin.close(); // 열어 놓은 윈도우 닫기
}
}
</script>
</head>
<body>
<h3>window의 close()로 윈도우 닫기</h3>
<hr>
<a href="javascript:window.close()"> 현재 윈도우 닫기</a><br>
<a href="javascript:closeNewWindow()"> 새 윈도우 닫기</a>
</body>
</html>

setTimeout / clearTimeout
<!DOCTYPE html>
<html>
<head>
<title>setTimeout()으로 웹 페이지 자동 연결</title>
</head>
<body>
<h3>이미지에 마우스를 올리고 3초간 그대로 있을 때 사이트로 이동합니다</h3>
<hr>
<img id="img" src="몬스터볼.jpg" onmouseover="startTimer(3000)" onmouseout="cancelTimer()">
<script>
var timerID = null;
function startTimer(time) { // 타이머 시작
// 이미지에 마우스 올리면 나타내는 툴팁 메시지
document.getElementById("img").title = "타이머 작동 시작...";
}
function cancelTimer() {
if (timerID != null) { clearTimeout(timerID); }
} // 타이머 중단
function load(url) {
window.location = url;
} // 현재 윈도우에 url 사이트 로드
</script>
</body>
</html>
setInterval()
<!DOCTYPE html>
<html>
<head>
<title>setInterval()로 텍스트 레프트 쉬프트</title>
</head>
<body>
<h3>텍스트가 레프트 쉬프트하며, 마우스로 클릭하면 중단합니다.</h3>
<hr>
<div><span id="div" style="background-color:yellow">
왼쪽으로 이동하는 텍스트입니다. 1- 2- 3- 4- 5- 6- 7- 8- 9- </span> </div>
<script>
var div = document.getElementById("div");
var timerID = setInterval("doRotate()", 200); // 200밀리초 주기로 doRotate() 호출
div.onclick = function (e) { clearInterval(timerID); } // 타이머 해제. 문자열 회전 중단
function doRotate() {
var str = div.innerHTML;
var firstChar = str.substr(0, 1);
var remains = str.substr(1, str.length - 1);
str = remains + firstChar;
div.innerHTML = str;
}
</script>
</body>
</html>

윈도우의 위치와 크기조절
<!DOCTYPE html>
<html>
<head>
<title>윈도우의 위치와 크기 조절</title>
</head>
<body>
<h3>윈도우의 위치와 크기 조절</h3>
<hr>
<button onclick="window.moveBy(-10, 0)">left</button>
<button onclick="window.moveBy(10, 0)">right</button>
<button onclick="self.moveBy(0, -10)">up</button>
<button onclick="moveBy(0, 10)">down</button>
<button onclick="resizeBy(10, 10)">+</button>
<button onclick="resizeBy(-10, -10)">-</button>
</body>
</html>
1초마다 10픽셀씩 자동 스크롤
<!DOCTYPE html>
<html>
<head>
<title>웹 페이지의 자동 스크롤</title>
<script>
function startScroll(interval) { setInterval("autoScroll()", interval); }
function autoScroll() { window.scrollBy(0, 10); } // 10픽셀 위로 이동
</script>
</head>
<body onload="startScroll(1000)">
<h3>자동 스크롤 페이지</h3>
<hr>
<h3>꿈길(이동순)</h3>
꿈길에<br> 발자취가 있다면<br> 님의 집 창밖<br> 그 돌계단 길이 이미 오래 전에<br> 모래가 되고 말았을 거예요<br><br> 하지만<br> 그 꿈길에서 자취 없다 하니<br> 나는 그것이 정말
서러워요<br><br> 이 밤도<br> 나는 님의 집 창밖<br> 그 돌계단 위에 홀로 서서<br> 혹시라도 님의 목소리가 들려올까<br> 고개 숙이고 엿들어요<br>
</body>
</html>

웹 페이지 프린트
<!DOCTYPE html>
<html>
<head>
<title>웹 페이지 프린트</title>
</head>
<body>
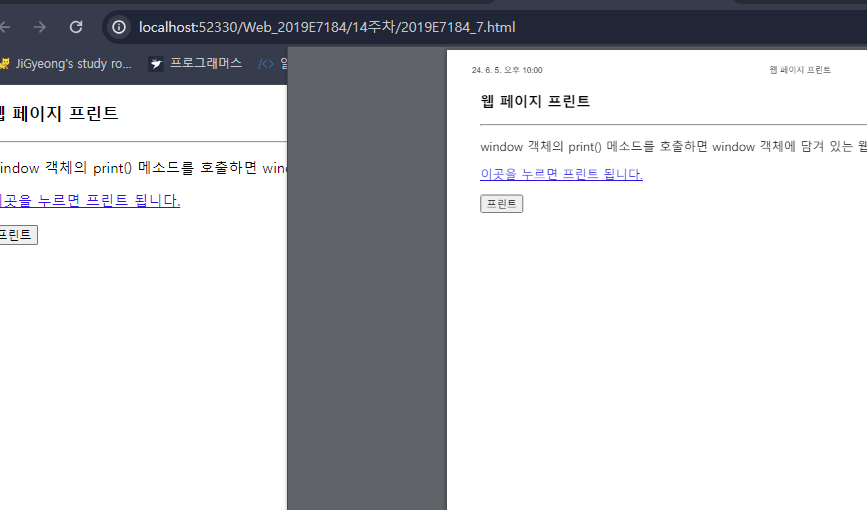
<h3>웹 페이지 프린트</h3>
<hr>
<p>window 객체의 print() 메소드를 호출하면
window 객체에 담겨 있는 웹 페이지가 프린트 됩니다.
<p>
<a href="javascript:window.print()">
이곳을 누르면 프린트 됩니다.
</a>
<p>
<input type="button" value="프린트" onclick="window.print()">
</body>
</html>
웹 페이지 프린트2(프린트시 배경 보이기)
<!DOCTYPE html>
<html>
<head>
<title>onbeforeprint와 onafterprint</title>
<style>
#logoDiv {
display: none;
position: absolute;
left: 0;
top: 0;
width: 100%;
height: 100%;
}
</style>
<script>
window.onbeforeprint = function (e) {
logoDiv = document.getElementById("logoDiv");
logoDiv.style.display = "block"; // block으로 변경. 로고가 화면에 나타나게 함
}
window.onafterprint = hideLogo;
function hideLogo() {
logoDiv = document.getElementById("logoDiv");
logoDiv.style.display = "none"; // <div> 영역이 보이지 않게 함
logoDiv.style.zIndex = -1; // 이미지를 문서의 맨 바닥으로 배치
}
</script>
</head>
<body>
<h3>onbeforeprint, onafterprint 이벤트 예</h3>
<hr>
<div id="logoDiv">
<img src="몬스터볼.jpg" alt="이미지 없습니다.">
</div>
<p>안녕하세요. 브라우저 윈도우에서는 보이지 않지만, <br>
프린트시에는 회사 로고가 출력됩니다. <br>
마우스 오른쪽 버튼을 눌러 인쇄 미리보기 메뉴를 선택해 보세요.</p>
</body>
</html>

location 객체로 웹 사이트 접속
<!DOCTYPE html>
<html>
<head>
<title>window.location으로 웹 사이트 접속</title>
<script>
function load() {
var select = document.getElementById("site");
window.location = select.options[select.selectedIndex].value;
}
</script>
</head>
<body>
<h3>window.location으로 웹 사이트 접속</h3>
<hr>
사이트 선택 :
<select id="site">
</select>
<p>
<button onclick="load()">웹 사이트 접속</button>
</body>
</html>
스크린 장치에 관한 정보 출력
<!DOCTYPE html>
<html>
<meta http-equiv="refresh" content="5">
<head>
<title>스크린 장치에 관한 정보 출력</title>
<script>
function printScreen() {
var text = "availHeight:".fontcolor('blue') + screen.availHeight + "<br>";
text += "availWidth:".fontcolor('blue') + screen.availWidth + "<br>";
text += "colorDepth:".fontcolor('blue') + screen.colorDepth + "<br>";
text += "pixelDepth:".fontcolor('blue') + screen.pixelDepth + "<br>";
text += "height:".fontcolor('blue') + screen.height + "<br>";
text += "width:".fontcolor('blue') + screen.width + "<br>";
document.getElementById("div").innerHTML = text;
}
</script>
</head>
<body onload="printScreen()">
<h3>스크린 장치에 관한 정보</h3>
<hr>
<div id="div"></div>
</body>
</html>

history
<!DOCTYPE html>
<html>
<head>
<title>history 객체 활용</title>
</head>
<body>
<h3>history 객체 활용</h3>
<hr>
<button onclick="history.back()">back()</button>
<button onclick="history.forward()">forward()</button>
<button onclick="history.go(-1)">go(-1)</button>
</body>
</html>

HTML 태그 내에 이벤트 리스너 작성
<!DOCTYPE html>
<html>
<head>
<title>HTML 태그에 리스너 작성</title>
</head>
<body>
<p>HTML 태그에 리스너 작성</p>
<hr>
<p onmouseover="this.style.backgroundColor='orchid'" onmouseout="this.style.backgroundColor='white'">
마우스 올리면 orchid 색으로 변경</p>
</body>
</html>

DOM 객체의 이벤트 리스너 프로퍼티
<!DOCTYPE html>
<html>
<head>
<title>DOM 객체의 이벤트 리스너 프로퍼티에 함수 등록</title>
<script>
var p;
function init() { // 문서가 완전히 로드되었을 때 호출
p = document.getElementById("p");
p.onmouseover = over; // over()를 onmouseover 리스너로 등록
p.onmouseout = out; // out()를 onmouseout 리스너로 등록
}
function over() {
p.style.backgroundColor = "orchid";
}
function out() {
p.style.backgroundColor = "white";
}
</script>
</head>
<body onload="init()">
<h3>DOM 객체의 이벤트 리스너 프로퍼티에 함수 등록</h3>
<hr>
<p id="p">마우스 올리면 orchid 색으로 변경</p>
</body>
</html>

DOM 객체의 addEventListener() 메소드 활용
<!DOCTYPE html>
<html>
<head>
<title>addEventListener()를 이용한 리스너 등록</title>
<script>
var p;
function init() { // 문서가 완전히 로드되었을 때 호출
p = document.getElementById("p");
p.addEventListener("mouseover", over); // 이벤트 리스너 등록
p.addEventListener("mouseout", out); // 이벤트 리스너 등록
}
function over() { p.style.backgroundColor = "orchid"; }
function out() { p.style.backgroundColor = "white"; }
</script>
</head>
<body onload="init()">
<h3>addEventListener()를 이용한 리스너 등록</h3>
<hr>
<p id="p">마우스 올리면 orchid 색으로 변경</p>
</body>
</html>

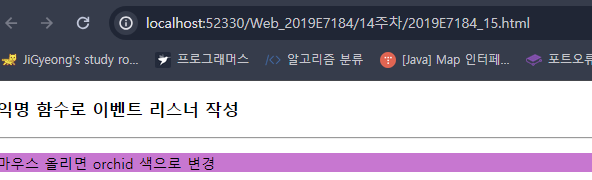
익명 함수로 이벤트 리스너 작성
<!DOCTYPE html>
<html>
<head>
<title>익명 함수로 이벤트 리스너 작성</title>
<script>
var p;
function init() { // 문서가 완전히 로드되었을 때 호출
p = document.getElementById("p");
p.onmouseover = function () { this.style.backgroundColor = "orchid"; };
p.addEventListener("mouseout",
function () { this.style.backgroundColor = "white"; } // 익명 함수
);
}
</script>
</head>
<body onload="init()">
<h3>익명 함수로 이벤트 리스너 작성</h3>
<hr>
<p id="p">마우스 올리면 orchid 색으로 변경</p>
</body>
</html>
이벤트 리스너에서 이벤트 객체 전달 받기
<!DOCTYPE html>
<html>
<head>
<title>이벤트 객체 전달받기</title>
</head>
<body>
<p id="p">마우스를 올려 보세요</p>
<button onclick="f(event)">클릭하세요</button>
<script>
function f(e) { // e는 현재 발생한 이벤트 객체
alert(e.type); // 이벤트 종류 출력
}
document.getElementById("p").onmouseover = f;
</script>
</body>
</html>

이벤트 객체에 들어있는 프로퍼티 값 출력
<!DOCTYPE html>
<html>
<head>
<title>이벤트 객체 프로퍼티</title>
</head>
<body>
<h3>이벤트 객체의 프로퍼티 출력</h3>
<hr>
<p id="p">버튼을 클릭하면 이벤트 객체를 출력합니다.</p>
<button onclick="f(event)">클릭하세요</button>
<script>
function f(e) { // e는 현재 발생한 이벤트 객체
var text = "▷type: " + e.type + "<br>"
+ "▷target: " + e.target + "<br>"
+ "▷currentTarget: " + e.currentTarget + "<br>"
+ "▷defaultPrevented: " + e.defaultPrevented;
var p = document.getElementById("p");
p.innerHTML = text; // 이벤트 객체의 프로퍼티 출력
}
</script>
</body>
</html>

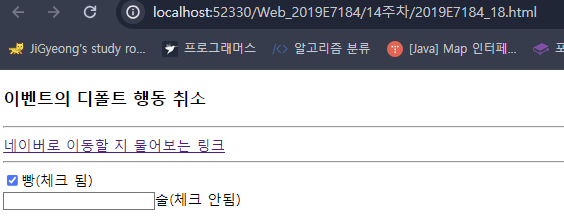
이벤트의 디폴트 행동 취소
<!DOCTYPE html>
<html>
<head>
<title>이벤트의 디폴트 행동 취소</title>
<script>
function query() {
var ret = confirm("네이버로 이동하시겠습니까?");
return ret; // confirm()의 리턴 값은 true 또는 false
}
function noAction(e) {
e.preventDefault(); // 이벤트의 디폴트 행동 강제취소
}
</script>
</head>
<body>
<h3>이벤트의 디폴트 행동 취소</h3>
<hr>
네이버로 이동할 지 물어보는 링크</a>
<hr>
<form>
<input type="checkbox">빵(체크 됨)<br>
<input type="checkbox“ onclick=" noAction(event)">술(체크 안됨)
</form>
</body>
</html>
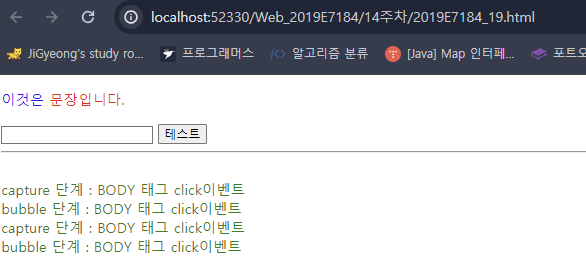
이벤트 흐름
<!DOCTYPE html>
<html>
<head>
<title>이벤트 흐름</title>
</head>
<body>
<p style="color:blue">이것은 <span style="color:red" id="span">문장입니다. </span> </p>
<form>
<input type="text" name="s">
<input type="button" value="테스트" id="button">
<hr>
</form>
<div id="div" style="color:green"></div>
<script>
var div = document.getElementById("div"); // 이벤트 메시지 출력 공간
var button = document.getElementById("button");
// body 객체에 캡쳐 리스너 등록
document.body.addEventListener("click", capture, true); // 켭쳐 단계(1)
// 타겟 객체에 버블 리스너 등록
button.addEventListener("click", bubble, false); // 버블 단계(2)
// body 객체에 버블 리스너 등록
document.body.addEventListener("click", bubble, false); // 버블 단계(3)
function capture(e) { // e는 이벤트 객체
var obj = e.currentTarget; // 현재 이벤트를 받은 DOM 객체
var tagName = obj.tagName; // 태그 이름
div.innerHTML += "<br>capture 단계 : " + tagName + " 태그 " + e.type + "이벤트";
}
function bubble(e) { // e는 이벤트 객체
var obj = e.currentTarget; // 현재 이벤트를 받은 DOM 객체
var tagName = obj.tagName; // 태그 이름
div.innerHTML += "<br>bubble 단계 : " + tagName + " 태그 " + e.type + "이벤트";
}
</script>
</body>
</html>
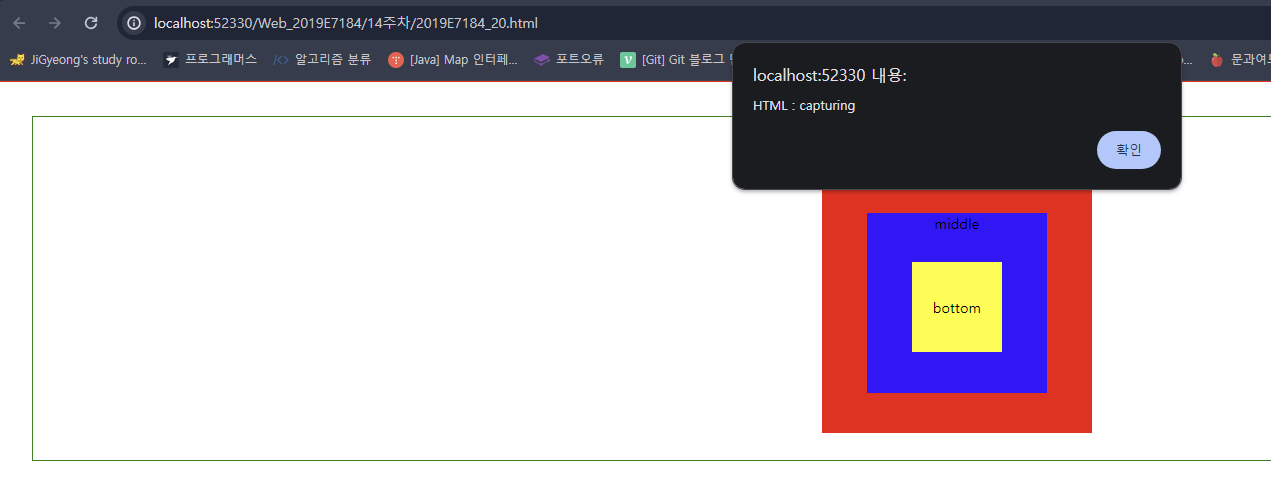
이벤트의 흐름 확인
<!DOCTYPE html>
<html>
<head>
<style>
html {
border: 1px solid red;
padding: 30px;
text-align: center;
}
body {
border: 1px solid green;
padding: 30px;
}
.top {
width: 300px;
height: 300px;
background-color: red;
margin: auto;
}
.middle {
width: 200px;
height: 200px;
background-color: blue;
position: relative;
top: 34px;
left: 50px;
}
.bottom {
width: 100px;
height: 100px;
background-color: yellow;
position: relative;
top: 34px;
left: 50px;
line-height: 100px;
}
</style>
</head>
<body>
body
<div class="top">top
<div class="middle">middle
<div class="bottom">bottom</div>
</div>
</div>
<script>
// true: capturing / false: bubbling
const useCature = true;
const handler = function (e) {
const phases = ['capturing', 'target', 'bubbling'];
const node = this.nodeName + (this.className ? '.' + this.className : '');
// eventPhase: 이벤트 흐름 상에서 어느 phase에 있는지를 반환한다.
// 0 : 이벤트 없음 / 1 : 캡처링 단계 / 2 : 타깃 / 3 : 버블링 단계
console.log(node, phases[e.eventPhase - 1]);
alert(node + ' : ' + phases[e.eventPhase - 1]);
};
document.querySelector('html').addEventListener('click', handler, useCature);
document.querySelector('body').addEventListener('click', handler, useCature);
document.querySelector('div.top').addEventListener('click', handler, useCature);
document.querySelector('div.middle').addEventListener('click', handler, useCature);
document.querySelector('div.bottom').addEventListener('click', handler, useCature);
</script>
</body>
</html>
onclick 리스너로 계산기 만들기
<!DOCTYPE html>
<html>
<head>
<title>onclick</title>
<script>
function calculate() {
var exp = document.getElementById("exp");
var result = document.getElementById("result");
result.value = eval(exp.value);
}
</script>
</head>
<body>
<h3> onclick, 계산기 만들기</h3>
<hr>
계산하고자 하는 수식을 입력하고 계산 버튼을 눌러봐요.
<p>
<form>
식 <input type="text" id="exp" value=""><br>
값 <input type="text" id="result">
<input type="button" value=" 계산 " onclick=" calculate()">
</form>
</body>
</html>

마우스 관련 리스너
<!DOCTYPE html>
<html>
<head>
<title>마우스 관련 리스너</title>
<script>
var width = 1; // 테두리 두깨
function down(obj) { obj.style.fontStyle = "italic"; }
function up(obj) { obj.style.fontStyle = "normal"; }
function over(obj) { obj.style.borderColor = "violet"; }
// 테두리 폭이 0일 때 색은 보이지 않는다.
function out(obj) { obj.style.borderColor = "lightgray"; }
function wheel(e, obj) { // e는 이벤트 객체
if (e.wheelDelta < 0) { // 휠을 아래로 굴릴 때
width = width - 1; // 폭 1 감소
if (width < 0) { width = 0; } // 폭이 0보다 작아지지 않게
}
else { // 휠을 위로 굴릴 때
width++; // 폭 1 증가
}
obj.style.borderStyle = "ridge";
obj.style.borderWidth = width + "px";
}
</script>
</head>
<body>
<h3>마우스 관련 이벤트 리스너</h3>
<hr>
<div>마우스 관련
<span onmousedown="down(this)" onmouseup="up(this)" onmouseover="over(this)" onmouseout="out(this)"
onwheel="wheel(event, this)" style="display:inline-block">이벤트
</span>가 발생합니다.
</div>
</body>
</html>

onmousemove
<!DOCTYPE html>
<html>
<head>
<title>마우스 이벤트 객체의 프로퍼티</title>
<style>
div {
background: skyblue;
width: 250px;
}
</style>
</head>
<body>
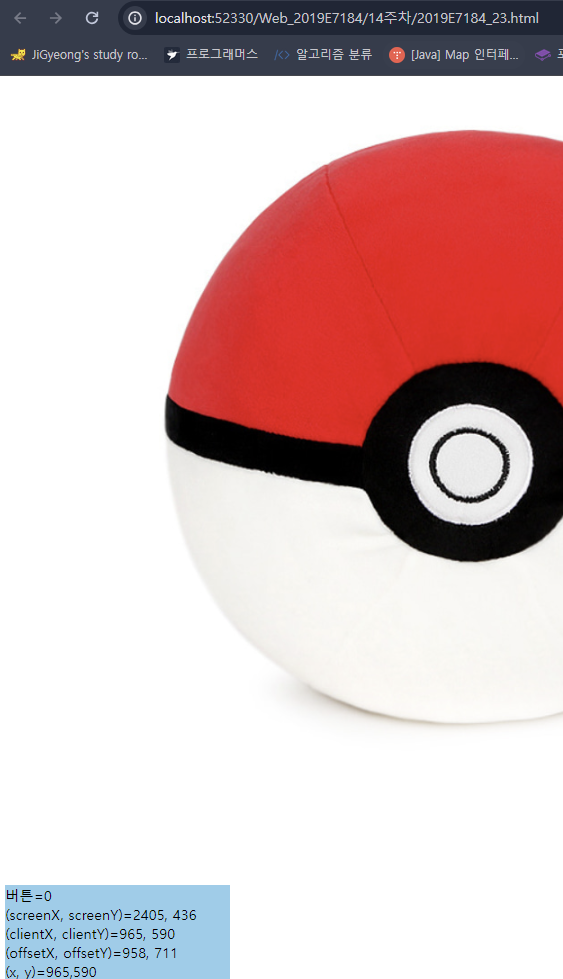
<h3>마우스 이벤트 객체의 프로퍼티와 onmousemove</h3>
<hr>
이미지 위에 마우스를 움직일 때 onmousemove 리스너가 실행되고, 마우스의 위치를 보여줍니다.<p>
<img src="몬스터볼.jpg" onmousemove="where(event)">
<p>
<div id="div"></div>
<script>
var div = document.getElementById("div");
function where(e) {
var text = "버튼=" + e.button + "<br>";
text += "(screenX, screenY)=" + e.screenX + ", " + e.screenY + "<br>";
text += "(clientX, clientY)=" + e.clientX + ", " + e.clientY + "<br>";
text += "(offsetX, offsetY)=" + e.offsetX + ", " + e.offsetY + "<br>";
text += "(x, y)=" + e.x + "," + e.y + "\n";
div.innerHTML = text;
}
</script>
</body>
</html>
oncontextmenu
<!DOCTYPE html>
<html>
<head>
<title>oncontextmenu</title>
<script>
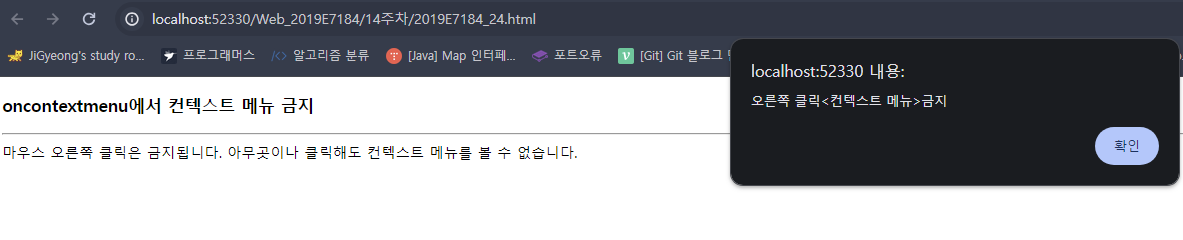
function hideMenu() {
alert("오른쪽 클릭<컨텍스트 메뉴>금지");
return false;
}
document.oncontextmenu = hideMenu;
</script>
</head>
<body>
<h3>oncontextmenu에서 컨텍스트 메뉴 금지</h3>
<hr>
마우스 오른쪽 클릭은 금지됩니다.
아무곳이나 클릭해도 컨텍스트 메뉴를 볼 수 없습니다.
</body>
</html>
onload
<!DOCTYPE html>
<html>
<head>
<title>HTML 문서의 onload</title>
</head>
<body onload="alert('이 사이트는 2024년 6월15일부터 \
newbongman.blog.me 로 옮겨지게 됩니다.')">
<h3>HTML 문서의 로딩 완료, onload</h3>
<hr>
이 페이지는 onload 리스너의 사용 예를 보여줍니다
이 페이지가 출력되고 난 바로 직후 onload 리스너를 통해 경고창을 출력합니다.
</body>
</html>

onload로 이미지의 크기 알아내기
<!DOCTYPE html>
<html>
<head>
<title>onload로 이미지 크기 출력</title>
<script>
function changeImage() {
var sel = document.getElementById("sel");
var img = document.getElementById("myImg");
img.onload = function () { // 이미지 크기 출력
var mySpan = document.getElementById("mySpan");
mySpan.innerHTML = img.width + "x" + img.height;
}
var index = sel.selectedIndex; // 선택된 옵션 인덱스
img.src = sel.options[index].value; // <option>의 value 속성
}
</script>
</head>
<body onload="changeImage()">
<h3>onload로 이미지 크기 출력</h3>
<hr>
<form>
<select id="sel" onchange="changeImage()">
<option value="BRR.png">뽀로로
<option value="DAK.png">닭
<option value="DDG.png">두더지
</select>
<span id="mySpan">이미지 크기</span>
</form>
<p><img id="myImg" src="" alt="."></p>
</body>
</html>

new Image()로 이미지 로딩
<!DOCTYPE html>
<html>
<head>
<title>new Image()로 이미지 로딩</title>
<script>
// 미리 로딩해둘 이미지 이름 배열
var files = ["BRR.png", "DAK.png", "DDG.png"];
var imgs = new Array();
for (var N = 0; N < files.length; N++) {
imgs[N] = new Image(); // 이미지 객체 생성
imgs[N].src = files[N]; // 이미지 로딩
}
// 다음 이미지 출력
var next = 1;
function change(img) {
img.src = imgs[next].src; // 이미지 변경
next++; // 다음 이미지
next %= imgs.length; // 개수를 넘으면 처음으로
}
</script>
</head>
<body>
<h3>new Image()로 이미지 로딩</h3>
<hr>
이미지를 클릭하면 다음 이미지를 보여줍니다.<p>
<img style="border:20px ridge wheat" src="BRR.png" alt="." onclick="change(this)">
</body>
</html>

onfocus와 onblur 입력 없이 다른 창으로 갈 수 없음
<!DOCTYPE html>
<html>
<head>
<title>onfocus와 onblur</title>
<script>
function checkFilled(obj) {
if (obj.value == "") {
alert("▷ 이름은 꼭 입력해야합니다.");
obj.focus(); // obj에 다시 포커스
}
}
</script>
</head>
<body onload="document.getElementById('name').focus();">
<h3>onfocus와 onblur</h3>
<hr>
<p>이름을 입력하지 않고 다른 창으로 이동할 수 없습니다.</p>
<form>
이름 <input type="text" id="name" onblur="checkFilled(this)">
<p>
학번 <input type="text">
</form>
</body>
</html>

선택된 라디오버튼 알아내기
<!DOCTYPE html>
<html>
<head>
<title>선택된 라디오버튼 알아내기</title>
<script>
function findChecked() {
var found = null;
var kcity = document.getElementsByName("city");
for (var i = 0; i < kcity.length; i++) {
if (kcity[i].checked == true)
found = kcity[i];
}
if (found != null)
alert(found.value + " 을 선택하였습니다.");
else
alert("선택된 것이 없음");
}
</script>
</head>
<body>
<h3>버튼을 클릭하면 선택된 라디오 버튼의 value 를 출력합니다.</h3>
<hr>
<form>
<input type="radio" name="city" value="seoul" checked>서울
<input type="radio" name="city" value="busan">부산
<input type="radio" name="city" value="chunchen">춘천
<input type="button" value="무엇을 선택했나 ?" onclick="findChecked()">
</form>
</body>
</html>

체크박스로 선택한 물품 계산
<!DOCTYPE html>
<html>
<head>
<title>선택된 물품 계산하기</title>
<script>
var sum = 0;
function calc(cBox) {
if (cBox.checked)
sum = sum + parseInt(cBox.value);
else
sum = sum - parseInt(cBox.value);
document.getElementById("sumtext").value = sum;
}
</script>
</head>
<body>
<h3>물품을 선택하면 금액이 자동 계산됩니다</h3>
<hr>
<form>
<input type="checkbox" name="hap" value=" 20000" onclick="calc(this)">모자(@20,000)<br>
<input type="checkbox" name="shose" value=" 90000" onclick="calc(this)">구두(@90,000)<br>
<input type="checkbox" name="bag" value=" 70000" onclick="calc(this)">가방(@70,000)
<hr>
지불하실 금액 <input type="text" id="sumtext" value="0">
</form>
</body>
</html>

select 객체에서 선택한 과일 출력
<!DOCTYPE html>
<html>
<head>
<title>select 객체에서 선택한 그림 표시</title>
<script>
function drawImage() {
var sel = document.getElementById("doll");
var img = document.getElementById("dollimage");
img.src = sel.options[sel.selectedIndex].value;
}
</script>
</head>
<body onload="drawImage()">
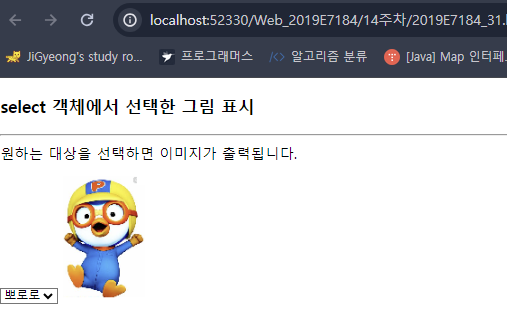
<h3>select 객체에서 선택한 그림 표시</h3>
<hr>
원하는 대상을 선택하면 이미지가 출력됩니다.<p>
<form>
<select id="doll" onchange="drawImage()">
<option value="BRR.png">뽀로로
<option value="DDG.png" selected>두더지
<option value="DAK.png">닭
</select>
<img id="dollimage" src="" alt="">
</form>
</body>
</html>
key 이벤트 리스너와 이벤트 객체의 프로퍼티
<!DOCTYPE html>
<html>
<head>
<title>키 이벤트</title>
<script>
function whatKeyDown(e) {
var str = "";
var div = document.getElementById("div");
div.innerHTML = ""; // div 객체 내용을 지운다.
if (e.altKey) {
if (e.altLeft) str += "왼쪽 Alt 키가 눌러졌습니다.";
else str += "오른쪽 Alt 키가 눌러졌습니다.";
}
if (e.shiftKey) {
if (e.shiftLeft) str += "왼쪽 Shift 키가 눌러졌습니다.";
else str += "오른쪽 Shift 키가 눌러졌습니다.";
}
if (e.ctrlKey) {
if (e.ctrlLeft) str += "왼쪽 Ctrl 키가 눌러졌습니다.";
else str += "오른쪽 Ctrl 키가 눌러졌습니다";
}
str += "<br>";
str += String.fromCharCode(e.keyCode) + "키가 눌려졌습니다."
div.innerHTML = str; // div 객체에 문자열을 출력한다.
}
</script>
</head>
<body>
<h3>키 리스너와 키 이벤트 객체의 프로퍼티</h3>
<hr>
텍스트 창에서 키를 눌러 보세요.<br>
Alt, Shift, Ctrl 키도 가능합니다.
<hr>
<form>
<input type="text" id="text" onkeydown="whatKeyDown(event)">
<input type="button" value="clear" >
<hr>
<div id="div" style="background-color:skyblue; width:250px; height:50px">
</div>
</form>
</body>
</html>

key 이벤트 리스너와 이벤트 객체의 프로퍼티